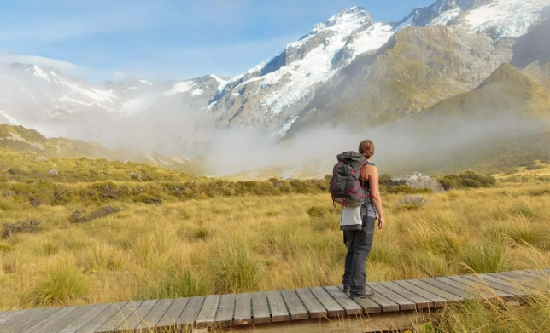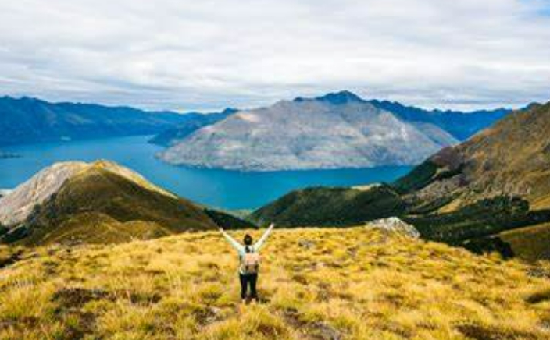
Lake Marian might be an unfamiliar name to those of you who came here through researching about Fiordland National Park, but it was my favorite experience in New Zealand so far. Most visitors who come to the park are usually here for Milford Sound, but my friends and I found it to be rather underwhelming. We were looking for a good hike, and although it is beautiful, Milford Sound wasn’t exactly what we were looking for.
Thankfully Fiordland National Park is a massive place with plenty of hiking options. We were in the mood for a day hike that rewards us with a good view, and that’s how I came across Lake Marian – billed as a relatively short hike with a beautiful alpine lake and the end of the track. I have not seen an alpine lake before so my curiosity was definitely piqued by this hike. Off we went to check out Lake Marian, my first alpine lake experience!
If you are looking for an itinerary for New Zealand South Island, you can check out my South Island itinerary overview here
Where to stay for visiting Lake Marian & Fiordland National Park
The closest town to Fiordland National Park is Te Anau. From there, it would still be a 1.5-2 hours drive to most points of interest in the park. It’s possible to stay in a bit closer, but you’ll be far from civilization and requires more planning in terms of food supply and general living.
I recommend staying at an Airbnb in Te Anau. If you are new to Airbnb, you can sign up using my link to get some discounts! The Airbnb we stayed in was this Lakeview house, which I highly recommend if you are going with a group.
They have 3 bedrooms and can accommodate 3-6 people comfortably. It comes with a full kitchen and modern appliances since the house is brand new (at least at the time of this writing). It’s also a 1-minute walk from Te Anau Lake, which is an awesome spot for sunset.
General Tips on visiting Fiordland National Park
For anyone planning to visit Fiordland National Park, you might find the following tips useful:
- Be prepared with food and petrol before you drive into the park. Along the main road of the park, called the Milford Sound Highway (SH94), there is no petrol station, no restaurants or convenience stores until you reach the very end at Milford Sound after driving for 2 hours. Even there, food options are limited (pizza and sandwiches) and the $10 per 100mb wifi is only available via satellite phone – which means it’s slow af, on top of being expensive af. So fill up your tank and make sure to bring snacks or even your own lunch.
- There will be no mobile signal or data throughout the park. The last place we had signal was right around Te Anau Downs, about 90km out from Milford Sound. Make sure you’ve done your research before entering the park! Or at least download an offline map so you can find your way around.
- The speed limit in the park is 100km/hour, and there are speed cameras along the highway. We got stopped by a traffic cop and fined for driving at 110km/hour. It didn’t even seem like we were going that fast because we were there during low season and there are not many other cars on the road. So be sure to keep an eye on your speedometer.
- There are these annoying little flies (sandflies?) all over the park. Normally I’m not so bothered by flies, but the ones here will bite you and the bite will sting for days. I got bitten by one of them and I could definitely feel the bite (it actually hurts!) and it did last for a few days after. So make sure you are covered whenever possible.
Getting to the Lake Marian Track
The entrance to the Lake Marian Track is easily accessible from the Lake Marian Carpark, just a turn from the Milford Sound highway (SH94) on Hollyford Road. The turn is ~87 km along the Milford Road from Te Anau. From there, you enter the track via a short swing bridge and begin your hike.
Lake Marian Trail Carpark
Hollyford River-Whakatipu Ka Tuka, Fiordland National Park 9679
Google Maps
The Lake Marian Track Experience
Overview of the Hike
Distance to the Lake: 5-6km return
Elevation Gain: 400-500 meters
Recommended Time: 4-5 hours (3 hours to hike, 1-2 hours at the lake)
Track to Marian Falls
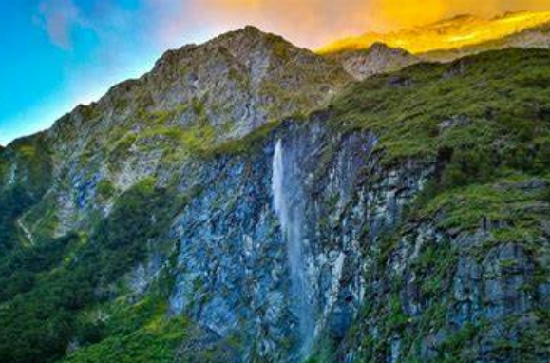
The first 10 minutes of the walk will be easy. It’s on a gravel road followed by a series of wooden bridges with very slight inclines. After about ten minutes of walking, you’ll start seeing the Marian waterfalls from the bridge. The waterfall track is only 2.4km return journey and would take you around 20 minutes tops. If you’re not keen on the long walk to see the actual Lake Marian, you can just turn around here and go back to the car park.
BONUS: While looking out to the waterfall, we saw a pair of dark-colored ducks with white bills basically water rafting on the fast water using just their bodies. I was quite amused by this and took videos of photos of the ducks. I was later informed that these ducks are Blue Ducks / Whio and are a rare endangered species of New Zealand. They are even featured on the $10 bill!
Track to Lake Marian
Once you go beyond the wooden bridge, the real track to Lake Marian begins. The track is not very technical but constantly goes uphill with very flew flat / downhill sections, so it will definitely make you sweat and get your heart pumping. But it’s still a fairly easy hike – it’s clearly marked with a bunch of bright orange arrows along the way so that you won’t have problems finding your way.
The track goes for 5-6km and will take around 3 hours to complete on a return journey, not including time spent at the lake itself. And you should still account for some time for staying at the lake itself for either photos or a picnic. We ended up staying for two hours at the lake, taking photos and walking around, because it was just so serene and beautiful! So set aside 4-5 hours of your time here if you plan to go.
The elevation gain is about 400-500 meters. I can’t find exact numbers on the internet – all websites seem to be giving different numbers, but those are the range I saw.
Lake Marian in Different Seasons
It’s worth noting the condition of the lake and tracks changes with seasons. First of all, during the colder or rainy season, the track might get slippery so make sure you are wearing proper hiking shoes with good treads.
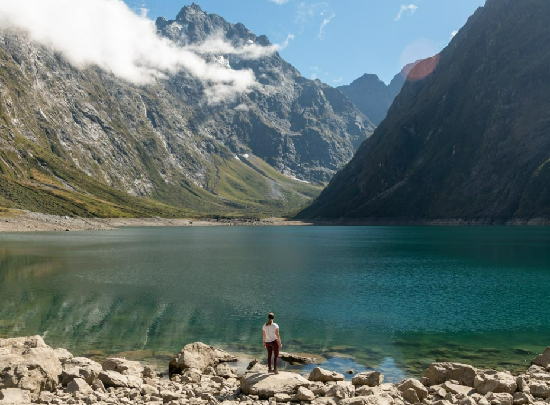
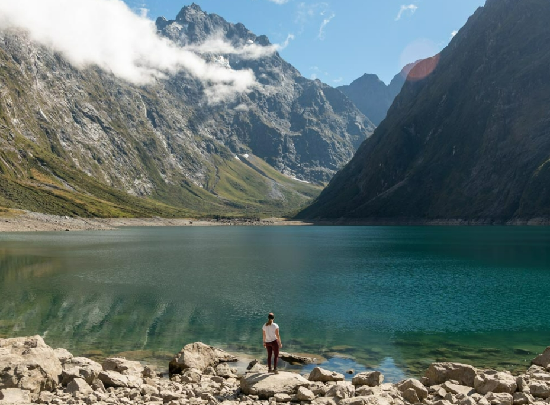
When we went today on 9 September (the end of winter and beginning of spring), the water levels on the lake were very low, exposing rocky terrains which can be easily traversed to get to the edge of the water. This made the visit a bit more exciting as it allowed us to walk around the perimeter to get near the water level.
However, walking far around the perimeter to the other side is still not recommended since the area is prone to avalanches during snow season. We actually heard a few small ones when we were there – it sounded like very loud thunder.
It’s also worth noting that the conditions might change very fast. We experienced all sorts of weather from cloudy to intermittent sunshine which gave us a glimpse of the turquoise water, and even very thick mist all within the 2 hours that we stayed at the lake.
During summertime, the snow around the park will start to melt and water level gets much higher in the lake. Walking around the perimeter might no longer be an option at that point since the lake is surrounded by thick forest that isn’t passable by foot. On the upside, the water temperature is beautiful during the summer and you can definitely swim if you’d like!
I must stress how quickly the weather changes in the valley where Lake Marian is located. The stark contrast in weather condition can be seen in this photo below, taken within ten minutes after the sunshine photo above. A sheet of thick mist had completely engulfed the lake and it could no longer be seen by the time we made our way back down to the trailhead.
And because I know I will be asked (and many people have asked) – my hiking boots are Columbia Newton Ridge Plus II in Mud/Sanguine. I got the Men’s cut because it was on sale, but you can get Women’s as well. I do like these boots very much because it’s cute, affordable and comfortable, but the leather topper is prone to scratches. I have a cut on my right boot already although you can’t really see it in this pic. Also, I wanted a pop of color so I changed the laces to the 3M Rope Laces in Red from Slickies.
All in all, this was probably my favorite hike ever! The trail itself was a good workout but the reward at the end was massive, as you can see from the photos above. Good ROI hike ?
Other Notable Hikes in Fiordland National Park
Do you still have some time to spend in the park? You can consider doing the following hikes:
Gertrude Saddle & Valley
This track is a highly technical track, described as an expert and unmarked track, but I’ve heard the reward at the end is massive – you get to overlook Milford Sound from the top of the saddle. You should only attempt going up if the weather is good, you are an experienced hiker and if you are of reasonable fitness. There had been some fatal accidents at the track, so please take this warning seriously!
We went to the Gertrude Saddle track but stayed within the valley since it was the tail end of winter and there was a lot of snow and ice on the track. We did not have any ice equipment with us and none of us is an experienced snow hiker, so we decided against going up.
The walk to and in the valley is very easy, but still unmarked so you must remember the way you came from. Also, there were some sharp rocks on the trail so I would recommend wearing proper shoes still.
Key Summit / Routeburn Track
This is another popular track, though we did not have a chance to visit. I think the Key Summit track would be an excellent choice for a day hike – it’s a 3 hours return journey. The Routeburn is a beautiful multi-day hike that takes you through gorges and waterfalls
- Click here for information on multi-day Routeburn Track
- Click here for information on the day hike Key Summit Track
If you are looking for an itinerary for New Zealand South Island, you can check out my South Island itinerary overview here
