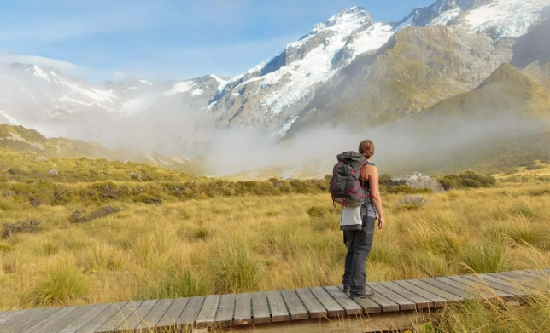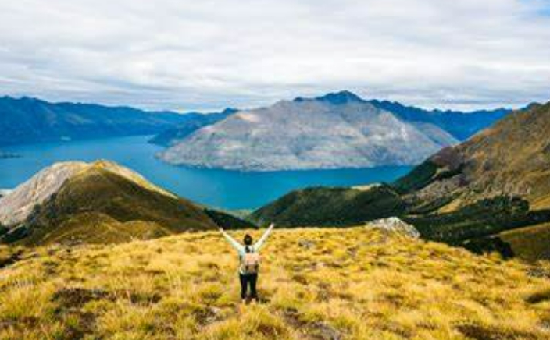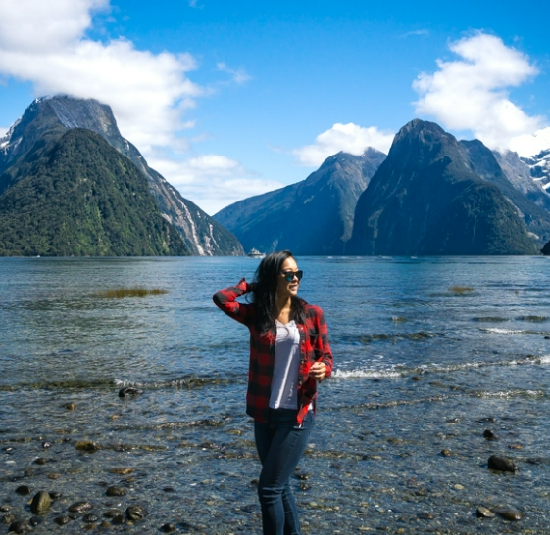
So, you’re planning to visit New Zealand? Lucky you, because you’re about to experience one of the world’s most beautiful place.
In this post, I’ll be taking you through my New Zealand South Island itinerary, which shows off some of the best sights New Zealand has to offer.

New Zealand South Island had long been on my to-visit list, but New Zealand is located out of the way from most places. It requires proper planning and setting aside precious vacation days, and I just kept getting distracted by other destinations to ever consider visiting New Zealand properly. So when an opportunity came up to check out the country, you bet I jumped on it! In total spent 2 weeks in New Zealand.
Anyway, enough fluff. let’s talk more about the big New Zealand trip!
- New Zealand South Island Overview
- How long should I set aside for the South Island in New Zealand?
- When is the best time to visit the South Island?
- New Zealand South Island Travel Tips
- Packing List for Hiking in New Zealand
- Weather in the South Island of New Zealand
- Accommodations in the South Island
- The 10-Day New Zealand South Island Itinerary
- Example Cost Breakdown of 10 days in New Zealand
New Zealand South Island Overview
New Zealand is made up of about 600 islands, but there are only two major islands: North Island and South Island. The majority of beautiful New Zealand landscapes and photos you see in travel magazines are located on the South Island.
And I swear, there are a lot of things to see here. 10 days was barely enough to scratch the surface of South Island. This is because every point of interest is so spread apart with a lot of ground to cover. After all, at around 150,000km², it’s not exactly a tiny island.
Despite this, I was surprised to learn that there are fewer people in the entirety of the South Island than there are people living in Auckland, the biggest city in New Zealand on the North Island.
So to put things into perspective for myself, I looked up the comparison of South Island to Singapore (where I live) in terms of population density. It turns out that there are nearly 6x more people on the tiny island of Singapore than on the South Island, even though the size of Singapore is only 0.5% the size of the South Island.
Crazy stuff, hey? Either Singapore is way too tiny or New Zealand is just that sparsely populated (I think it’s both).
OK, now that I’m done feeling small about my home country – back to the travel tips.
How long should I set aside for the South Island in New Zealand?
You’ll need at least 10 days to properly see the South Island, and that’s why this blog post has been written as a 10-day itinerary.
However, there is so much to see on the South Island that you can stay here as long as you have the time for. If time is not a constraint, I would stay 14 days so I have more time for all the hikes I didn’t get to do.
When is the best time to visit the South Island?
Remember that New Zealand is located in the southern hemisphere, so its seasons are the opposite of what one might believe are the conventional seasons.
Here are the seasons in New Zealand:
With this in mind, I think the best time to visit the South Island is at the tail end of Spring and towards Summer, from November to December. Summer is a very popular time to go to New Zealand due to all the outdoor activities that can be done when it’s not too cold out.
That said, I went at the tail end of Winter in September, and we still had a great time, as you will soon see in this blog post. It might be a little cold, but it’s a different kind of beauty to see the beautiful landscape covered in a layer of snow in crisp winter air.
New Zealand South Island Travel Tips
I find that New Zealand is very similar to Australia, so a lot of the tips below are going to overlap with my previous posts:
1. Renting a car – You MUST rent a car when visiting the South Island in New Zealand. Driving is a requirement to see most of the South Island, especially if you want to do it in 10 days. One way to further optimize this is to arrange to pick up a car rental straight from the airport you’re flying into, then arrange to drop it off from the other airport you will be flying out of. This will save you tons of time. For example, we picked up our car at Queenstown Airport but we dropped it off at Christchurch Airport at the end of our trip. Which, brings me to my next point…
2. Open-jaw your flight ticket – We have a lot of ground to cover in the South Island, so we decided to open-jaw our trip for the sake of time optimization – we flew into Queenstown and flew out of Christchurch. That way, we did not have to drive back to Queenstown at the end of the trip. I highly recommend doing this too if you are pressed for time. You can do this in reverse too, of course. Meaning, that you can choose to fly to Christchurch and fly out of Queenstown.
3. Driver’s License – Make sure you have your valid Driver’s License with you. If your license is not in English, you’ll need to have it translated by an authorized department or have an International Driver’s License with at least a month’s validity left.
4. Speed Limit – Like Australia, the New Zealand traffic police are strict on speed limits. We got pulled over once for driving a little over the limit at Fiordland National Park, but lucky for us they let us off with a warning.
5. Fill up the fuel tank before returning your rental car – or it’s going to cost you later. The rental car company will fill it up for you and charge you a premium for it.
6. Get a local SIM Card for data – Having a local data is crucial for any trip. You can pre-purchase a SIM card here and pick it up once you’re in NZ. 4G connection is widely available in most of the towns I went to. You might lose connection when you’re out in remote areas, but the cities remain well connected.
7. Businesses are closed early – In smaller towns, most amenities are closed by 6 pm. Yes, even grocery stores! So plan ahead if you need to replenish resources. In bigger cities like Auckland, Christchurch, and Queenstown you might still have a chance to shop a bit later than 6 pm. This was such a shock for me, coming from Singapore where our grocery stores are open almost 24/7!
8. Wear proper sun protection – The sun can be very strong in NZ. Always wear sunscreen and layer up with extra light clothing and a hat to shield yourself, even when you plan to be in the car all day.
9. Download Google Maps offline – I downloaded offline maps on my Google Maps app just in case we go off the grid. We experienced low connectivity when deep inside the national parks, and having the map offline was massively helpful.
10. Check road conditions – If you are visiting during Winter or the beginning of Spring, make sure you check road conditions ahead of time. A change of weather might render certain routes impassable – for example, a few days after we left, the South Island was hit with a huge snowstorm which knocked over some trees, and the road to Glenorchy was cut off from Queenstown. We were just there a week before!
11. Take the DOC’s grading of hiking tracks with a grain of salt – Even if the grading says a hiking track is “easy” it might not be a walk in the park – see my Ben Lomond summit blog for example. I feel like the DOC – short for Department of Conservation, the Nature Park Service of New Zealand – is catering to a very fit audience!
12. Apply for NZ ETA – Make sure to check if you need to apply for NZ ETA before arriving in New Zealand. NZ ETA is the travel authorization needed for those who hold passports with visa waiver for visiting New Zealand. You can apply for NZ ETA here.
Packing List for Hiking in New Zealand
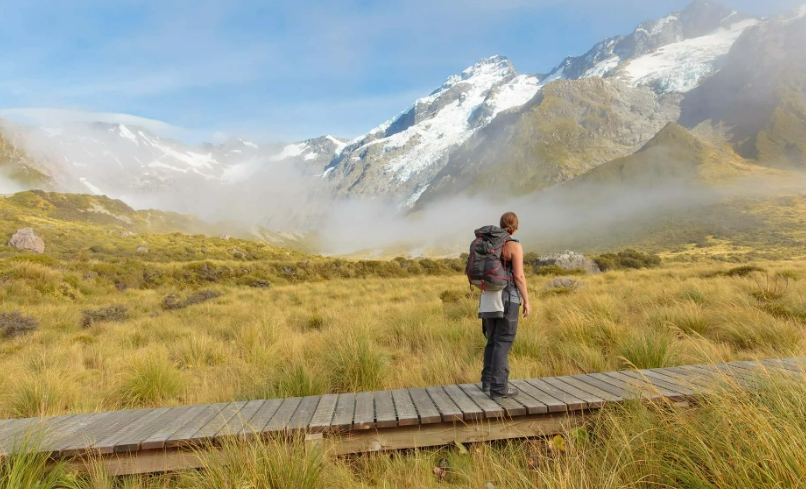
The main reason why many people come to visit New Zealand is to enjoy the beautiful nature. And you can only enjoy the most of that by hiking. If you are planning to hike, here are some things that might come in handy:
- As with any trip, bring a Portable Charger. My favorite charger is the Xiaomi 10,000 mAh. This stuff is super powerful. It can charge an iPhone twice.
- Bring a good yet light windbreaker. It gets very windy and cold on some days. I used Uniqlo Blocktech Parka which was sufficient. Because it’s light, I can fold it up and stow it away when I’m not using it.
- Sunscreen – I can’t stress this enough. The UV index can get high in New Zealand so you need to protect your skin!
- Sunglasses – for the same reason as above. Also, if you plan to go somewhere covered in snow on a sunny day, it will protect you against snow blindness. Something I only learned during the hike to Ben Lomond.
- Snow gloves – if you visit at the tail end of Winter or the beginning of Spring, there might still be some snow in the mountainous area. So you’ll want something waterproof and insulated to crawl on snow if necessary. This was yet another thing I learned during the hike to Ben Lomond.
- Hiking shoes – yes, you need to wear proper hiking shoes with sufficient treads! My hiking boots are Columbia Newton Ridge Plus II in Mud/Sanguine which served me really well during this trip and many other hiking trips. I wanted a pop of color so I changed the laces to the 3M Rope Laces in Red from Slickies.
Weather in the South Island of New Zealand
I was in New Zealand in the first two weeks of September. The weather gets very cold once you hit South Island during those weeks.
The temperature day-to-day varies greatly. One day it would be sunny and warm with blue skies, the next day it would be rainy and cold. Make sure to plan if you’re planning to do a long hike!
On average, the daily temperatures were 9-12 C but in some colder nights, it went below 0 C. There was even a snowstorm that hit Queenstown and Wanaka (thankfully a few days after we left) even though it was already mid-September.
Accommodations in the South Island
Since we were a group of 5 people, we booked 3 bedroom houses with a full kitchen and amenities, and they ended up costing us about $30-40 / night per person through Airbnb.
Of course, if you are traveling in a smaller group, it will cost more. If I was traveling by myself I would look at backpacker hostels instead.
The 10-Day New Zealand South Island Itinerary
The area you’d want to visit in South Island falls under Te Wahipounamu, which is Maori for “the greenstone waters”. It’s the South West New Zealand World Heritage, which in turn is internationally recognized by UNESCO World Heritage. This list encompasses Fiordland, Mount Aspiring, Mount Cook, and Westland Tai Poutini.
If you are only in South Island for 10 days, you can probably cover 3 out of 4 unless you really pack in the days.
Here’s our 10-Day New Zealand South Island Itinerary:
- Day 1-3: Get to Queenstown and Fiordland National Park
- Day 4-5: Queenstown and surrounding areas
- Day 6-7: Wanaka and Mount Aspiring National Park
- Day 8-9: Aoraki / Mount Cook and Lake Tekapo
- Day 10: Drive to Christchurch and Fly out
- Cost Breakdown of the trip
You can check the map below to visualize the itinerary. I’ve also marked up things to see and restaurants to eat at.
? Save this map to your phone! If you are a Google user, click on the image of the map above. The map will then be saved to your “Recent” maps viewed. Click here for instructions on how to view the map later. It will work from your phone too.
Alright, now let’s cover the details of the 10-Day New Zealand South Island Road Trip Itinerary:
Day 1-3: Get to Queenstown and explore Fiordland National Park (Stay overnight at Te Anau)
As mentioned before, we decided to open-jaw our flight tickets. Meaning, we would fly to Queenstown first and then fly out of Christchurch at the end of our trip. We do this to save time since there are a lot of things to see and do in the South Island!
Our first stop, Queenstown, is the most beautiful town I’ve ever flown into. We flew to Queenstown from Auckland, and I paid an extra $5 to get a window seat since I had a feeling the view would be epic.
… And I was right!
I took a gamble, but I was lucky enough to have picked the side of the plane that’s facing West, which is where all the scenic Southern Alps are. I highly recommend sitting on this side if you ever fly in or out of Queenstown. The last hour of the flight before descending to Queenstown Airport was just pure scenic – worth every cent of the measly $5 I paid for a window seat.
As soon as we landed in Queenstown, we picked up our rental car and drove down to Te Anau, which took 2.5 hours. Te Anau is the closest civilization to Fiordland National Park, and where most people would stay overnight.
Once we got to Te Anau, there wasn’t much else we could do since it was already late. So we settled in our Airbnb and watched the sunset from Lake Te Anau, which was very picturesque that night.
The next day, we drove up to Fiordland National Park. This national park is located in the southwest of the South Island and houses some of the most famous sights of New Zealand. Fiordland National Park is part of Te Wahipounamu and is a UNESCO World Heritage site.
What to do at Fiordland National Park:
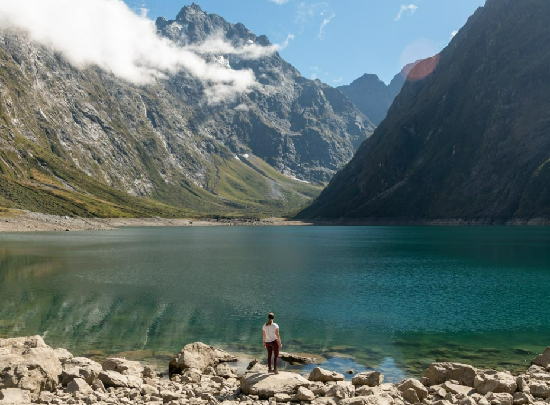
1. Lake Marian Hike – My favorite hike in the Fiordland. It was a sufficiently challenging yet short hike, and the reward at the end of it was a beautiful alpine lake. What more could you ask for?
?️ More about Lake Marian hike: I wrote a separate post about our experience hiking to Lake Marian. You can read the post for more information and what to expect.
2. Gertrude Saddle – This track is highly technical. It is described as an expert and unmarked track. However, I’ve heard the reward at the end is massive – you get to overlook Milford Sound from the top of the saddle. We went at the tail end of winter, and unless you have experience with ice climbing and the right equipment, I don’t recommend going up to the summit. So we just stayed around in the valley which was still quite scenic.
3. Key Summit Track – This is another popular track, though we did not have a chance to visit. I think the Key Summit track would be an excellent choice for a day hike – it’s a 3 hours return journey from start to finish.
4. Milford Sound – Probably the most famous attraction in the park! I’ve got to be honest, I found it a little underwhelming and very touristy compared to everything else we saw, but it’s still a must-visit. The popular thing to do at Milford Sound is to take a cruise around the fiord.
Our Itinerary at Fiordland National Park
- Day 1/10: Get to Queenstown and drive to Te Anau
- Day 2/10: Milford Sounds and Gertrude Saddle at Fiordland National Park (or Key Summit Track)
- Day 3/10: Lake Marian Hike at Fiordland National Park
In retrospect, I think I would have swapped Day 2 with the Key Summit track since we wanted to hike more. I personally felt Milford Sound was a little underwhelming even though it’s a popular site.
Where to stay in Te Anau
3-bedroom house – We stayed at an Airbnb in Te Anau, however it is no longer listed. At that time, it was a brand new 3-bedroom holiday home with very modern amenities. It was only a 2-minute walk to Lake Te Anau. Here are a few similar properties:
Budget Options – If you are looking for budget accommodation, I recommend the following hostels:
- YHA Te Anau
- Te Anau Lakefront Backpackers
- Barnyard Backpackers – this one is out of the Te Anau, but closer to Fiordland National Park than Te Anau
Day 4-5: Queenstown
I’ll say it again, Queenstown is the most beautiful town I’ve ever visited. Everywhere you look, you are greeted with a beautiful view of the dramatic Southern Alps mountain range over Lake Wakatipu.
I know we aren’t supposed to play favorites, but Queenstown was my favorite stop in this itinerary. Could you blame me though, when the beautiful lake and snow-capped mountains can be seen right outside the windows of our Airbnb? I did not want to leave!
What to do at Queenstown
1. Hiking to the summit of Ben Lomond – My most memorable moment in Queenstown is hiking to the summit of Ben Lomond. The track is NOT an easy hike despite being graded as “Easy” by the DOC, but it’s worth it.
?️ Hiking Ben Lomond: I wrote a detailed post about our experience hiking up Ben Lomond. More info on hiking Ben Lomond in this blog post!
2. Take a short drive to Glenorchy, a cute little town just north of Queenstown. There are a few cool tracks you can do near Glenorchy (Lake Sylvan track for example). Otherwise, the drive up from Queenstown to Glenorchy was just simply beautiful.
Glenorchy Tour: This trip is doable on your own, or you can opt to take this Glenorchy Tour which will also show you the shooting locations of a famous movie cough cough Lord of the Rings.
3. Do Adventure Sports – Queenstown is known for high-adrenaline sports activities. So if you’re up for it, here are some activities you can do. I suggest you pick one:
- Skydiving in Queenstown – New Zealand is known as one of the best skydiving spots in the world. If you want to skydive in New Zealand, Queenstown is THE place to do it!
- Kawarau Bridge Bungee Jump – If Skydiving is not your thing, then perhaps you can try the bungee jump instead! It’s a 43m jump over the Kawarau River.
- The Nevis Swing – The swing is also a great option for that adrenaline rush, you’ll be swinging across a canyon 160m over the Nevis River.
- Shotover Jet – If you prefer to do water sports instead but still want the excitement, then you might be interested in this 30-minute jet boat ride on the Shotover River.
- Skyline Gondola (with optional Luge Ride) – You can take this gondola to see Queenstown from above, or as a shortcut to the Ben Lomond summit. I highly recommend reading my blog on Ben Lomond first if you are thinking of hiking up. It may not be as easy as you expected.
- If you decided to take the Gondola, then you might be interested in The Ledge Swing as well. It will send you 400m flying over Queenstown!
Our Itinerary at Queenstown
- Day 4/10: Drive to Queenstown from Te Anau (2.5 Hours) in the morning, visit Glenorchy, or do one of the activities I mentioned above!
- Day 5/10: Hike up to Ben Lomond in Queenstown (approx 6-8 hours)
Where to stay in Queenstown
We stayed at an Airbnb in Queenstown – (update: Unfortunately this Airbnb is no longer available for booking, but I’ll list some similar options below) It is just an average 3-bedroom apartment, but that view was the best out of all the accommodations we had. Check this out:
Hotels – As mentioned above, the Airbnb I booked is no longer active but here are some similar options in the same area. You’d want to stay near Frankton Road for the view I posted above (click here for the general area). These accommodations are 5-10 minutes’ drive to town so I would only recommend it if you are driving.
Budget Options – If you are looking for budget options, you can look at the following hostels. It might not have a spectacular view like the one I posted, but it will be right in the middle of town and close to amenities.
- Absoloot Value Accommodation Hostel
- JUCY Snooze Queenstown
- The Flaming Kiwi Backpackers
- Base Queenstown
- Nomads Queenstown Backpackers
- YHA Queenstown Central
- YHA Queenstown Lakefront
PS: YHA, Base, and Nomads are all well-known chains for backpacker hostels across Australia and NZ, while Absoloot and JUCY are local NZ businesses.
Day 6-7: Mount Aspiring National Park (Stay overnight at Wanaka)
Mount Aspiring National Park is part of the Southern Alps that I saw on my flight down to Queenstown. Like Fiordland, Mount Aspiring National Park is also part of Te Wahipounamu and is a UNESCO World Heritage site.
What to do at Mount Aspiring and Wanaka:
1. Rob Roy Glacier Track – A beautiful AND easy hike just an hour away from Wanaka. Part of the road leading to the start of the track is private farmland, so if you’re a city girl like me this would be a very amusing drive.
Hiking the Rob Roy Glacier Track: You can read all about my experience on the Rob Roy Glacier track here. Hint: So many cows. So many sheep.
2. Roys Peak – Probably the most Instagrammed hike in New Zealand. It’s very popular so you’d be hiking with a lot of people too. The hike is also very dull since it just zigzags up the hill, but I heard the view above is worth it! But you probably have to queue for it since this is such a popular hike. We chose not to do this since we had just hiked up Ben Lomond a few days prior, and we were also not in the mood for queueing for a photo op.
3. Isthmus Peak – similar to Roy’s Peak, but lesser known. You can try this hike if you don’t feel like dealing with the crowd at Roy’s Peak.
4. Lake Wanaka and That Wanaka Tree – This lake is right in the middle of Wanaka town so you have no excuse not to check it out! There is also a pretty cool tree that is partly inside the lake and is a popular subject for photography.
5. Skydive Wanaka – If you missed out on skydiving in Queenstown, you can still do it here in Wanaka. You’ll be able to see the Mount Aspiring range from the sky.
Our Itinerary at Wanaka
- Day 6/10: Drive to Wanaka (1 Hour) in the morning, visit Lake Wanaka, and see That Wanaka Tree
- Day 7/10: Rob Roy Glacier Track at Mount Aspiring, followed by Skydiving
Where to stay in Wanaka
- The White Room – This is a studio apartment that can accommodate up to 4 people.
Budget Options – If you are looking for budget options in the town, you can take a look at the following hostel:
PS: YHA and Base are well-known chains for backpacker hostels across Australia and NZ
Day 8-9: Aoraki / Mount Cook National Park (Stay overnight at Twizel)
This area had been long known to Maori as Aoraki, which means “Cloud Piercer”. It was then renamed Mount Cook after James Cook in 1851, but the name Aoraki was reincorporated back in 1998 out of respect for Maori history.
And yep, you guessed it. Like the other two national parks I’ve mentioned above, Aoraki is also part of Te Wahipounamu and is a UNESCO World Heritage site.
What to do at Aoraki / Mount Cook:
1. Hooker Valley Track – This is a very easy and very scenic 10km return route. The track is mostly flat and can be done by children and adults alike. I saw many families with young children picnic-ing on the trail. The trail ends at Hooker Lake, with a great view of the famous Mount Cook.
Dive Deeper: You can read about my Hooker Valley Track experience here.
2. Blue Lakes and Tasman Glacier – another easy track, shorter than Hooker Valley that ends up with a glacier view.
3. Lake Pukaki – This is the lesser-known twin of Lake Tekapo. I preferred Lake Pukaki better than Tekapo because it’s quieter! If you are here in the Spring, it’s also known for the Lupin flowers.
4. Lake Tekapo – probably the most famous Alpine lake in New Zealand. Unlike Lake Pukaki, you can find restaurants and a tourist center at the base of the lake closest to the main road.
5. Church of Good Shepherd at Lake Tekapo – Lake Tekapo is also where the famous church is located. This tiny yet picturesque stone church is an iconic landmark of Lake Tekapo and has been a popular subject of night photography. Don’t expect to be the only photographer here!
Recommended itinerary at Aoraki / Mount Cook
- Day 8/10: Drive to Twizel (1 Hour) in the morning, visit Hooker Valley Track at Aoraki and Lake Pukaki along the way
- Day 9/10: Visit the Lake Tekapo area and the Church of Good Shepherd
Where to stay in Twizel / Aoraki
- Our Airbnb in Twizel – A cozy little 3-bedroom house. It is very convenient as a base for Aoraki and Lake Tekapo.
Other economic options you can consider:
- YHA Aoraki / Mt Cook – This one is not in Twizel, it’s located in Mount Cook village which is right where the Hooker Valley Track is. It’s a bit more on the pricier side even though it’s a backpacker hostel, but you cannot beat this location.
- High Country Lodge and Backpacker
- Lake Ruataniwha Holiday Park
- Lakefront Lodge Backpackers – This one is by Lake Tekapo, also a bit pricy for a backpacker hostel.
Day 10: Drive to Christchurch and fly out
We spent some time in Christchurch after leaving Twizel, but this was only because we were flying out of Christchurch Airport. It’s not that Christchurch is not worth visiting – I think it’s a very cool city. But if you are optimizing time to see nature in New Zealand, then Christchurch should not be at the top of your list.
Keep in mind the drive from Twizel to Christchurch is 3 hours, so if you’re flying out early you might want to stay in Christchurch the night before to make sure you won’t be missing the flight.
Where to stay in Christchurch
For backpacker options:
- YMCA Christchurch
- Urbanz
- Jailhouse Accommodation
- JUCY Snooze Christchurch
- YHA Christchurch Rolleston
Example Cost Breakdown of 10 days stay in New Zealand
Since a lot of people emailed me about this, here are the total cost expenditures for 10 days in South Island for 5 people. I was able to get a detailed number since we were using Splitwise to track group spending!
My airfare to NZ costs S$1260 (or roughly US$920). I did not include it in the cost calculation, because airfare cost varies depending on where you’re coming from.
Obviously, If you are traveling with fewer people, the cost could go up since sharing a car and hotel with fewer people means more total per person.
But as you can see, the majority of the cost comes from accommodation. We stayed mainly in Airbnb, but if you are willing to go budget, then the cost can go down quite a bit. I also would budget a few hundred dollars more for any emergencies and activities you might want to do (skydiving and tours).
Do you still have more time to spend on the South Island?
If you are staying longer than 10 days in the South Island (oh lucky you!!!), you can consider hitting up the following places:
- Kahurangi National Park to the northwest of Christchurch. I had heard great things about Arthur’s Pass.
- Westland Tai Poutini National Park. This is where the highly photographed Fox Glacier and Franz Josef Glacier are! I would definitely go visit if I had the chance to go back.
And… that’s all from me for New Zealand! I can safely say New Zealand was the most beautiful country I’ve ever visited, in terms of nature and scenic routes. It could be because I haven’t traveled to the mountains during winter, so seeing snow almost every day was a brand-new experience for me.
And of course, what’s a road trip without friends? I did this trip with my teammates who are also my good friends. This was a remote work trip for us. We would go hiking in the morning and work in the afternoon and into the night to sync up with the team in Singapore.
Thank you Lucas, for organizing the trip, Shekhar for driving (a LOT), and Ezra and Nishant for being great travel buddies! This is one of the most memorable trips that I keep thinking back about.
PS: Want to reference this post later?
Click on any of the images below to pin to your Pinterest board!
